


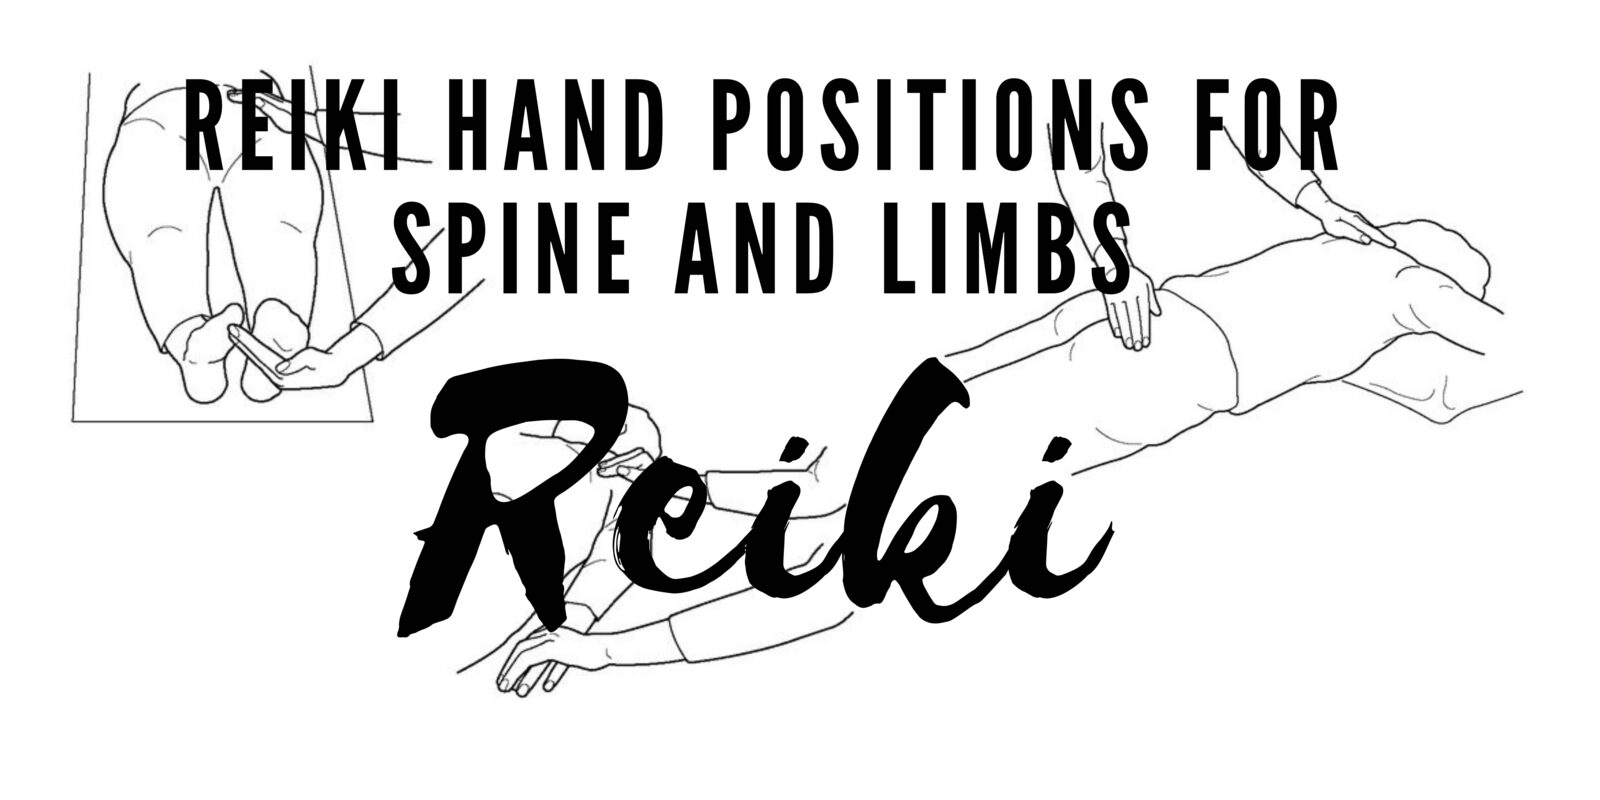
The following extra hand positions are traditionally used alongside a standard session, or when a particular area seems to want attention. They can be practised on yourself at any time. For another person, ask permission before each area, offer a hands-off alternative, and never interpret a symptom or promise relief.
Additional Reiki Hand Positions For Spine And Limbs
The Spine
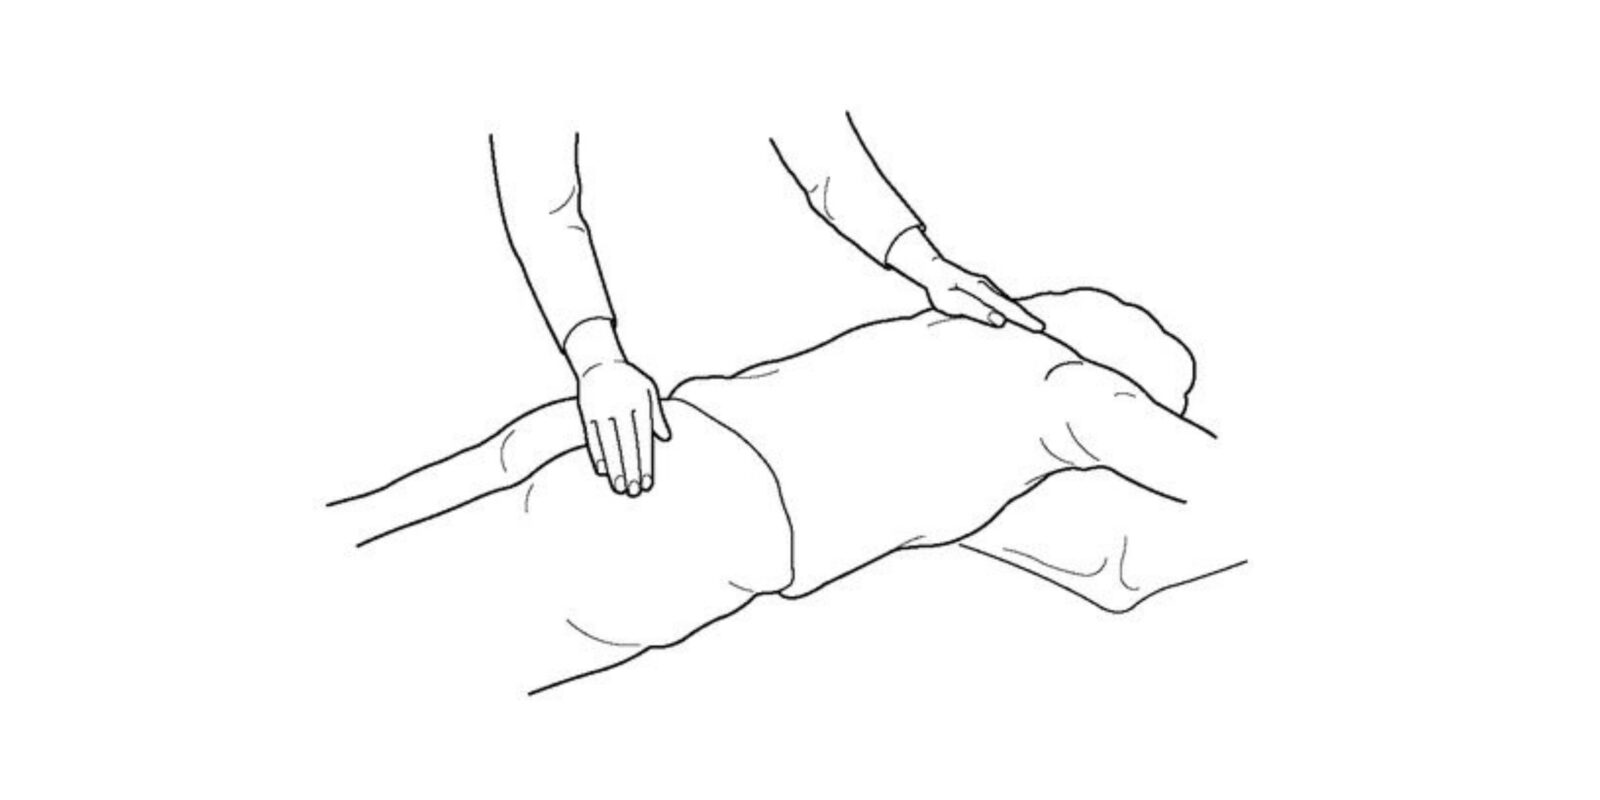
Many report a deep release of tension and a renewed sense of ease after this position. It can be done with the person lying on their stomach or side, or seated or standing if lying flat is uncomfortable for medical reasons. Ask permission before placing your hands at the base of the spine and at the top of the spine, just below the base of the skull, and offer to hover your hands above each area instead. Hold for several minutes, picturing Reiki travelling up and down the spine between your hands. In the tradition this is described as moving along the "Hara line" that links the chakras, clearing blockages and restoring a balanced flow of ki; that is a spiritual description, not a physical or medical one.
The Arms And Hands
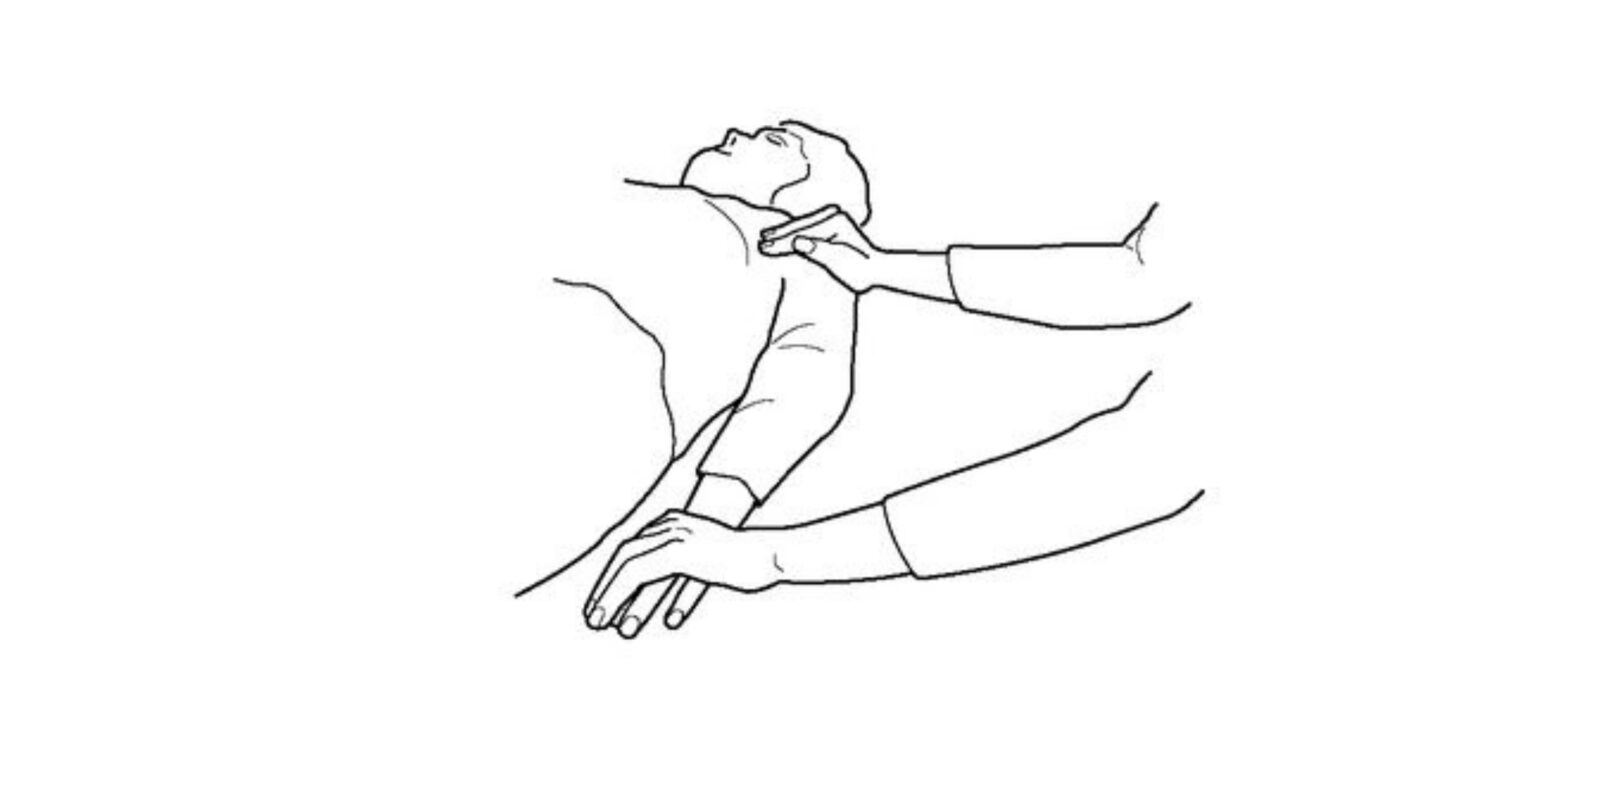
If someone has discomfort in an arm, this is a gentle position they may find settling. Do one arm at a time. Ask permission, then place one hand on the shoulder and the other on the hand — or hover above either — and let the Reiki flow between your hands for a few minutes. In the tradition this is described as opening the energetic channels at the shoulder, elbow and hand; it is not a treatment for the discomfort, and persistent pain should be assessed by a qualified professional.
The Legs And Feet
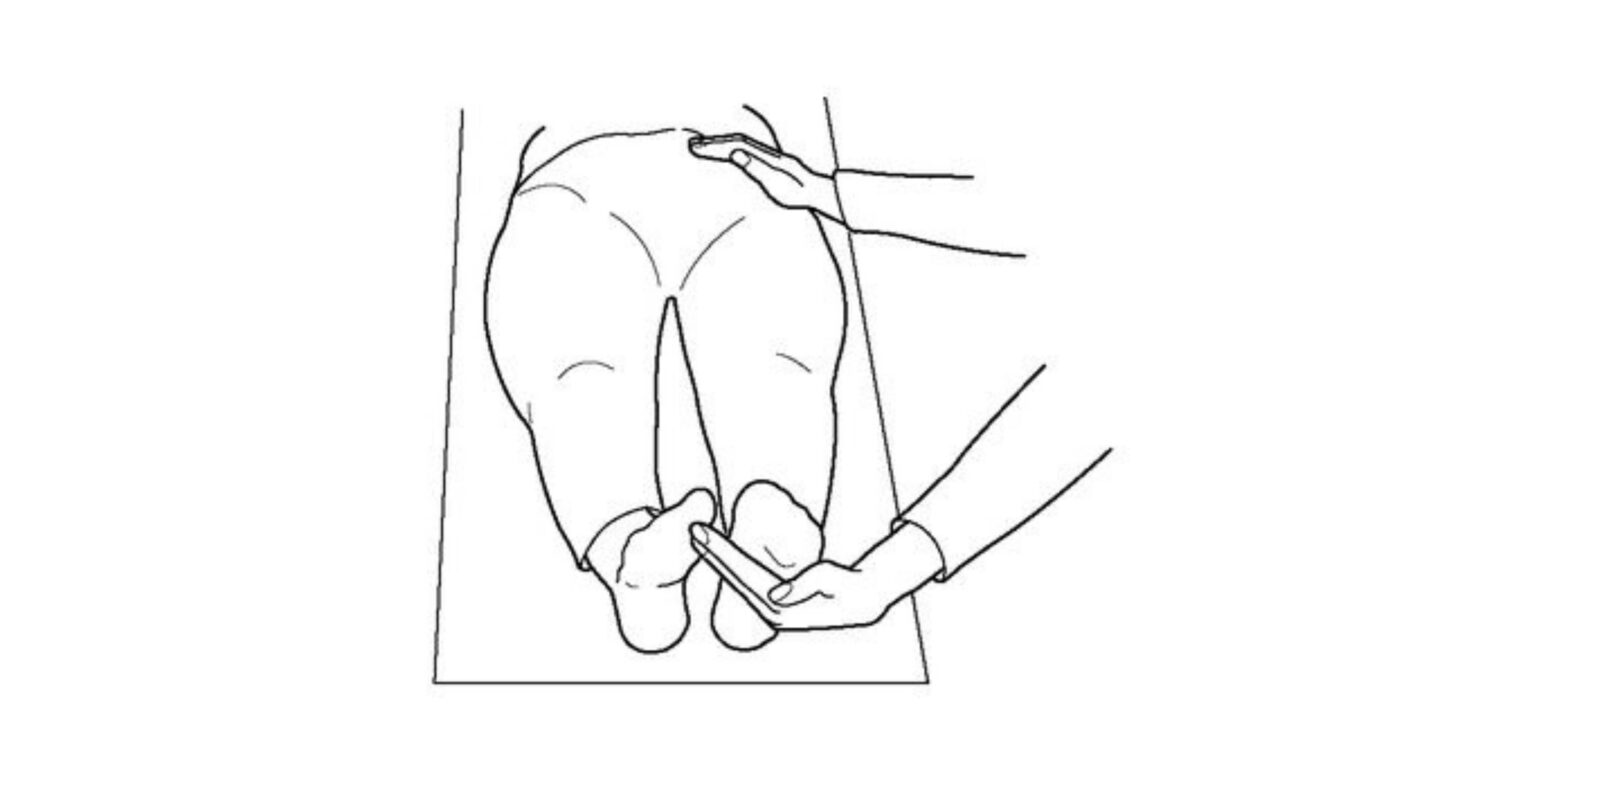
If someone has discomfort in a leg, work one leg at a time and start with the feet. Ask permission before holding a hip and a foot, and offer to hover instead if touch is not wanted. Let the Reiki flow between your hands for several minutes. In the tradition this is described as opening minor chakras and supporting a sense of vitality and grounding at the end of a session; it is not a treatment for the discomfort itself.
You can add these positions to a standard session or use them on their own. Remember that consent and comfort come first, and that no particular result can be promised.
Sequential Positions For Legs, Feet, Arms And Hands
A second way to cover the limbs is to move through a short sequence of positions. For the legs and feet, hands are normally held for one or two minutes at each position, following your own judgement and staying longer only if it remains comfortable for both of you.
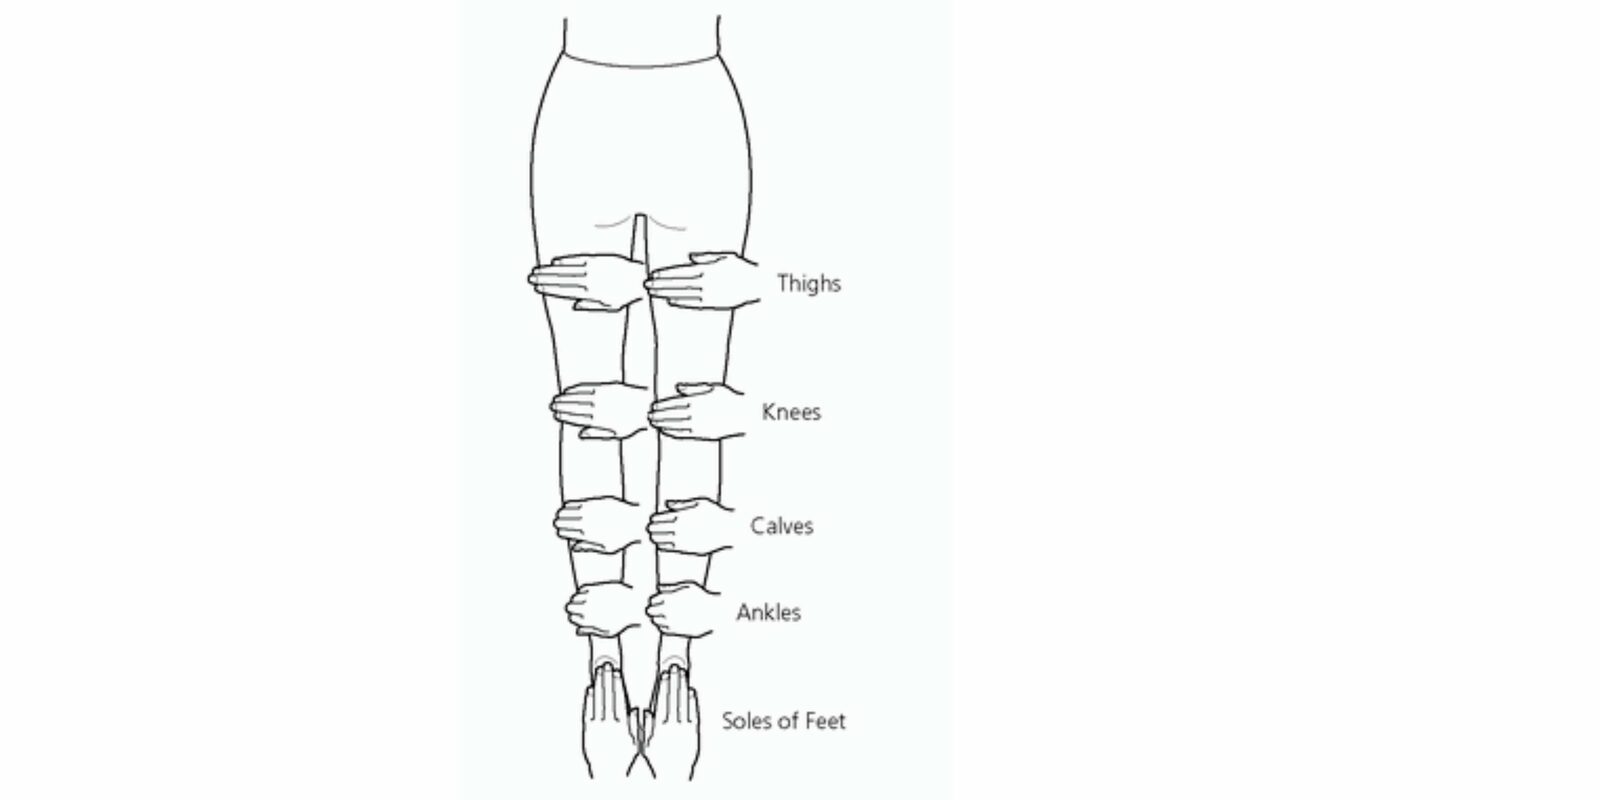
Client Lying On Front
- Place one hand on each thigh.
- Place one hand on the back of each knee.
- Place one hand on each shin.
- Place one hand on the back of each ankle.
- Place one hand on the sole of each foot (also covering the toes).
Client Lying On Back
- Place one hand on the front of each thigh.
- Place one hand on the front of each knee.
- Place one hand on the front of each calf.
- Place one hand on the front of each ankle.
- Place one hand atop each foot (also covering the toes).
Arms And Hands
Because treating both arms simultaneously while the client is lying down is difficult, treat one arm and then make your way around the body to the other side. It doesn't matter which arm you start with.
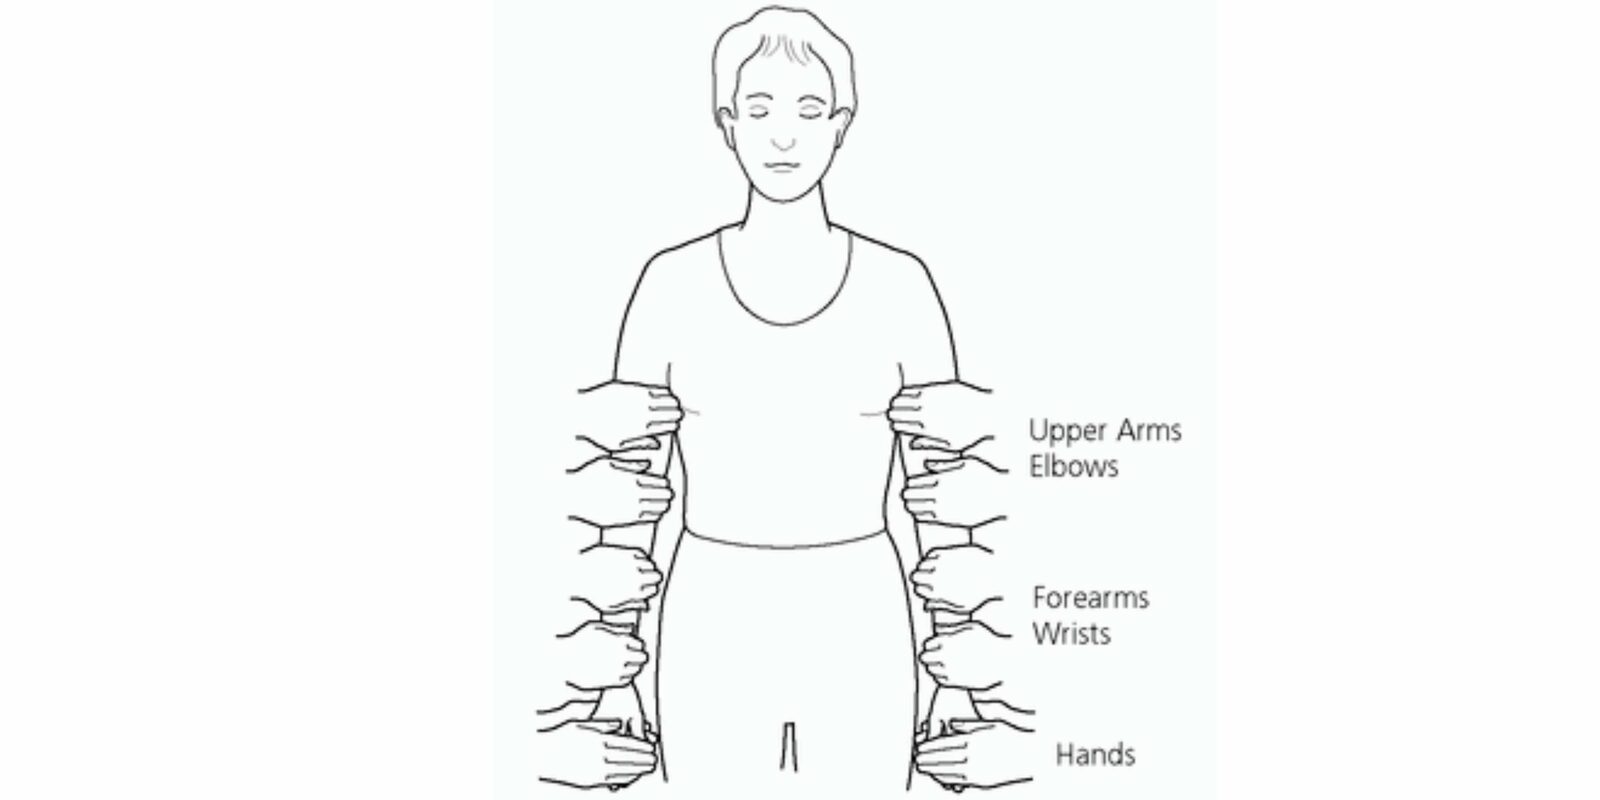 You can treat the arms and hands immediately after the front-of-torso positions, or after the front of the body is treated.
- Grasp the upper arm with one hand and the elbow with the other. After a few minutes (typically no more than two), softly reposition your hands.
- With one hand on the forearm and the other on the wrist, hold the forearm. After a few minutes, softly reposition your hands.
- Place one hand beneath the client's hand and one on top of it. After a few minutes, gently remove your hands and switch to the opposite arm, or rouse the client and ask them to turn over.
Use the 12 hand positions of the classic Western session as a framework and add these positions where they are wanted. Adapt them to the person in front of you, keeping their consent, comfort and dignity at the centre.
A consent script for limbs
Hands and feet can feel more personal than a shoulder or a back, and a general yes to "a session" is not a yes to each one. A short script keeps the conversation clear:
"I would like to work with your arms and hands next. I can rest my hands on your shoulder and hand, hold them just above, or leave this part out. Which would you prefer? I will keep you covered, and you can tell me to stop at any point."
Then repeat the same question for the legs and feet, and again before changing from one side to the other. If the person is unsure, offer the hands-off version. Do not fill a silence with touch.
When lying flat is not comfortable
The limb positions can be adapted to a reclining chair, a bed with pillows, or a seated position with the feet supported. Ask the person to choose the posture and move themselves where possible. Let them reposition their own limbs. If they need assistance, ask a caregiver or clinician how to support the move.
For a seated session, work with one arm at a time and keep the hand positions within easy reach. A foot may rest on a cushion rather than being held. If a person uses a wheelchair, ask before touching any part of the chair and keep hands away from controls, brakes and pressure-relief areas.
Questions about the limb sequence
How long should each position last? One or two minutes is a common guide, but comfort and the person's preference matter more. A shorter hold is not incomplete.
Can I practise this on myself? Yes. The arms and legs are easy to reach, and you can use the same positions with a light touch or hover. The spine position is harder to reach; use the back-of-body self-treatment options instead.
What if a limb feels numb or tingly? Remove your hands, let the person move and settle, and do not interpret the sensation as energy. Persistent numbness, weakness or pain needs ordinary medical assessment, not more Reiki.
Does the sequence have to follow a fixed order? No. The order here is a teaching structure. You can work on one area, stop, or return to it later.
The front-of-body and back-of-body pages cover the torso positions, and Completing The Reiki Session covers the close.
Related topic: Treatment and hand positions, 10-day treatment with acupressure, Advanced techniques, Alternative techniques in treatment, Alternative ways to use the hands.